


Gift Wrapping without Paper

The history of wrapping paper dials back to 2nd century B.C. in ancient China, where paper was first invented to wrap money and gifts among the government officials. Back then, paper was precious materials made primarily with plants and water, it took time and energy to produce, therefore, it was not something people quickly dispose after single use like how we do today.
As the technology advances, paper became easier to mass produce. All kinds of designs and glitter are printed to suit different occations of gifting. Overtime, wrapping paper became less costly to manufacture, and easy to find at a local stationary store.
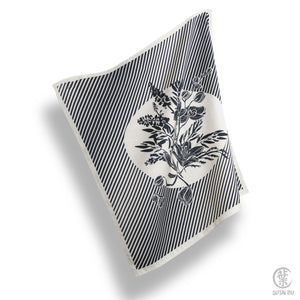
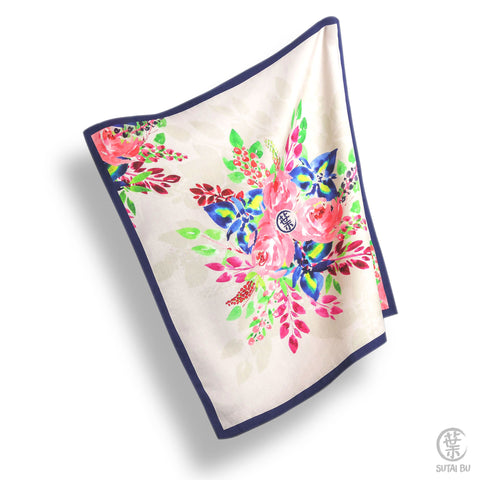
Aside from paper, did you know wrapping with cloth is also an alternative way to add personality to your gift? For fabric, it takes extra time to manufacture. Compared to paper, fabric is far more durable than paper when it comes to wrapping, and definitely more reusable as it is washable, and heat can take out the crease lines on fabric, but not on paper!
Wrapping with cloth is not a new trend, in fact, it has been around before you and I were born! The Japanese call this cultural art Furoshiki and the Korean calls it Bojagi.
Furoshiki 101

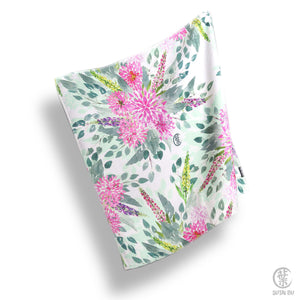
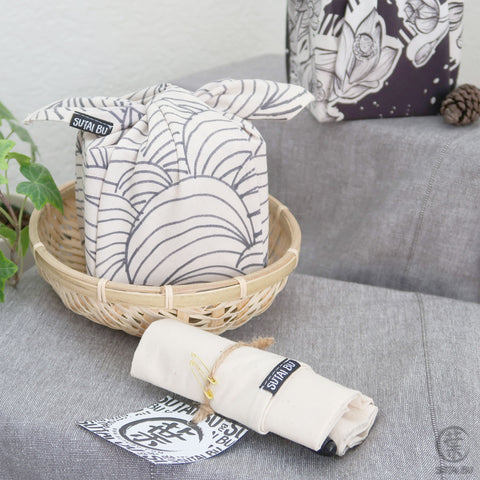
Today we want to introduce you 3 ways to wrap with our signature wrapping band and standard 18” Fursohiki cloth with a 4x4x4 inches kraft box.
Traditionally, Furoshiki cloths come in a wide range of sizes, believe it or not, each size has its own name as well!
Furoshiki 101

Are you ready for your new wrapping adventure?
Let’s begin!
YOU'LL LEARN


STYLE 1
WRAPPING BAND AS A RIBBON
STEP 1
Place your gift in a 4x4x4 inches kraft box. Don’t have one? You can get one that is similar in size, or get from our Shop. You will also need our Signature Wrapping Band, don’t have one? Check out ours!
STEP 2
With the top on the box upright, find and place the center point of the wrapping band on top of the box.
STEP 3
Wrap around the box, flip the box to crisscross on the bottom of the box. Now, wrap the ends back up to the top of the box.
STEP 4
Anchor the band by crisscrossing the tails once. Make sure they are nice and flat to create that clean look you are looking for!
STEP 5
Lastly, tie your most beautiful bow. Decorate it with a couple leaves and a pinecone. The gift is now ready to go out! Need help on how to tie an upright bow? Check out our post on How to Tie an Upright Bow.
STYLE 2
MINIMALISTIC WRAP IN 18" CHUHABA
(WITH A MINI HANDLE ON TOP)
STEP 1
Two things you need for this style – 18” Wrapping Cloth and 4x4x4 inches kraft box. Don’t have one? You can get one that is similar in size, or get from our Shop.
STEP 2
With the top on the box upright, find and place the center point of the wrapping band on top of the box.
STEP 3
Wrap around the box, flip the box to crisscross on the bottom of the box. Now, wrap the ends back up to the top of the box.
STEP 4
Anchor the band by crisscrossing the tails once. Make sure they are nice and flat to create that clean look you are looking for!
STEP 5
Lastly, tie your most beautiful bow. Decorate it with a couple leaves and a pinecone. The gift is now ready to go out! Need help on how to tie an upright bow? Check out our post on How to Tie an Upright Bow.

STYLE 3
MINIMALISTIC WRAP IN 18" CHUHABA
STEP 1
Lay open your selected Fursohiki cloth, with the wrong side facing up. Place the box diagonally in the center of the cloth, where are logo is located!
STEP 2
The next few steps require you to use both your hands and fingers!
Pull together the top and bottom corners, hold down tight with one of the hands.
STEP 3
Use your left hand to pull the other corner out straight. Similar to Style 2: Step 4, use your right fingers to crease and gather the side folds as your pull up the left corner with your left hand.
Lock down the fold and crease by holding the tail tight with your right hand.
Here’s the fun step: switch hands! Be sure the folds are tight as you magically switch your hands.Confused? Be patient with yourself. Practice makes perfect. Watch the repeating GIF below, you will get it in no time!
STEP 4
Once you have all the tails in one hand, hold on tight! Use your free hand to grab the last tail, wrap around the bundle of tails once, then slip in a self-knot.
PRO TIP
Keep the tightness consistent, don’t lose the grip!